

Key Points
- The first thing to do in case of a leak: close the main water shut-off valve to cut off the supply immediately
- Telefuga offers 24h service in 5 provinces: if the leak occurs at night or on weekends, we are available
- Documenting the damage with photos and video before cleaning is key for the insurance to cover the repair
- The deadline to report the incident to the insurance is 7 business days (art. 16 Insurance Contract Law)
- With 38,000 resolved leaks, Telefuga locates the leak without construction and issues a technical report for the insurer
Data updated in September 2026 — Information verified with internal data from Telefuga and real reviews from Google Maps.
Have you just discovered a leak? The first thing: close the shut-off valve
If you have just discovered a water leak in your home, close the main shut-off valve right now. It doesn't matter if it's big or small, if it's dripping slowly or gushing: cutting off the supply is the first mandatory step to prevent further damage. At Telefuga, with over 38,000 resolved leaks, a rating of 4.8/5 on Google Maps (319 reviews) and 16 years of experience, we have handled emergencies of all kinds — from a drip under the sink to flooding entire homes — and we always repeat the same thing: act quickly, act well.
This guide explains what to do step by step, from the moment you discover the leak to the final repair and the claim to the insurance. Follow these 8 steps and you will minimize the damage, protect your home, and facilitate insurance coverage.
Step 1: Close the main shut-off valve
The main shut-off valve cuts off all water supply to the home. It is your first line of defense against a leak. But many people do not know where it is, especially if they have just moved in. Here are the most common locations depending on the type of home:
In an apartment
- Inside the home: Usually in the kitchen (under the sink), in the main bathroom (behind a panel or technical cabinet) or in the entrance (next to the meter box). If your apartment is built after 2006 (CTE), there should be an accessible shut-off valve next to the individual meter.
- In the meter battery: In older buildings, the valve may be in the meter room of the lobby or in a community cabinet on the landing. Each meter has a shut-off valve before and after the device.
In a detached house or single-family home
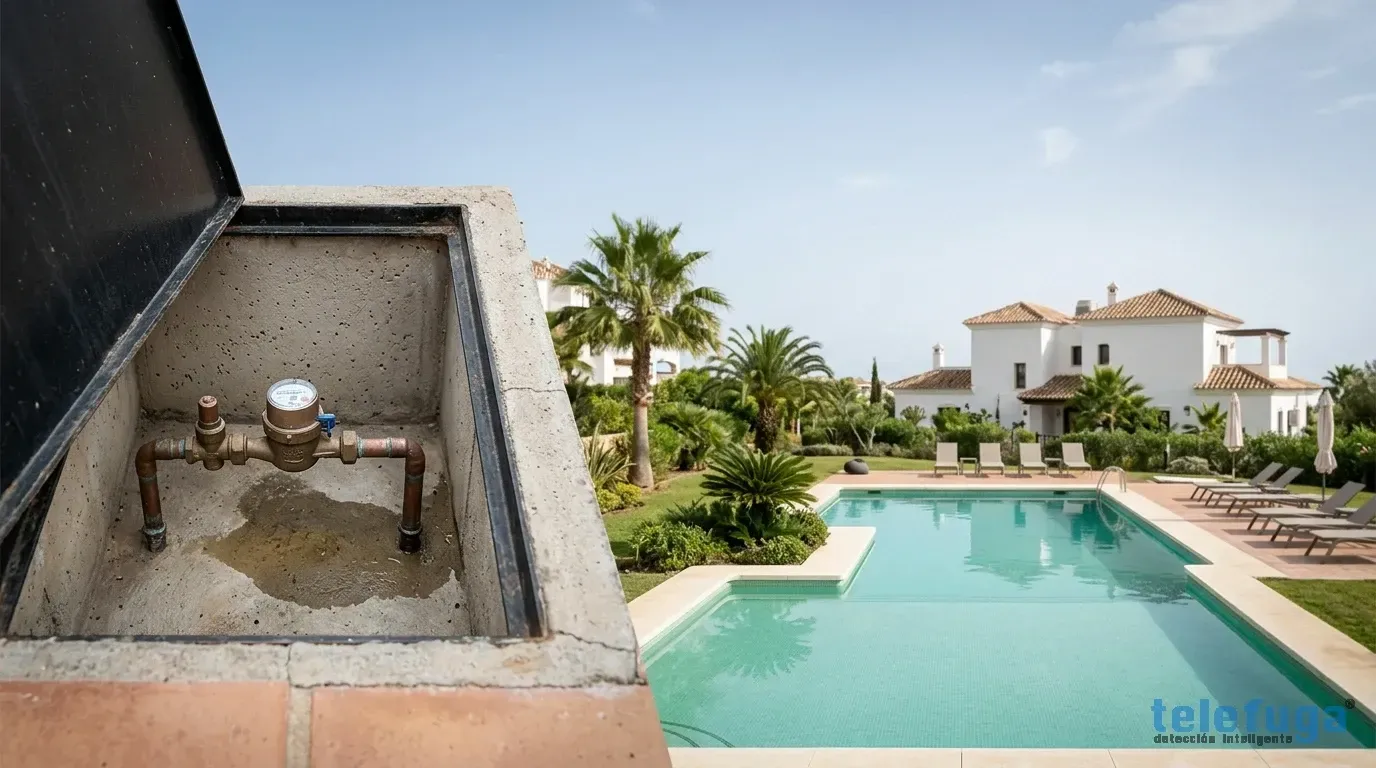
- External chamber: In most detached houses, the main shut-off valve is in a buried chamber on the sidewalk or next to the facade, before the entrance to the house. You will need a square key (T-shaped tool) to open it.
- Utility room: If the house has a boiler room or technical space, the main valve may be there, next to the heater or boiler.
In a commercial premises
- Meter cabinet: Commercial premises have their meter and shut-off valve in a specific cabinet, usually on the facade or in the common area of the building.
- Interior valve: There should be an interior shut-off valve behind the connection, but in older premises it may not exist or be hidden behind renovations.
Telefuga Tip: Don't wait until you have an emergency to locate your shut-off valve. Do it now. Mark its location with a visible adhesive label. If it is an old valve that you have never used, turn it carefully to check that it works (it may be stuck due to lime). If it does not close completely, call a plumber to replace it as soon as possible.
Step 2: Cut off the electricity (when to do it and when not)
Water and electricity are a dangerous combination. But it is not always necessary to cut the power. Here are the criteria:
YES you should cut the electricity when:
- The water has reached outlets, power strips, or connected electrical devices
- There is water on the floor near an electrical panel or a circuit breaker
- The leak is coming from the ceiling and there are recessed lights or halogen spots
- You feel tingling or shocks when touching wet surfaces
- The circuit breaker has tripped (this is a sign that the water has already caused a short circuit)
NO it is not necessary to cut the electricity when:
- The leak is localized (a drip under the sink, a pipe leaking at a specific point)
- The water has not reached any electrical installation
- The leak is contained in an area without outlets or devices (for example, inside an insulated false ceiling)
How to cut off: Go to your home's electrical panel and lower the main switch (IGA - Main Automatic Switch). If you only want to disconnect a specific area, lower the corresponding circuit breaker. NEVER touch an electrical panel with wet hands or barefoot on wet ground. Use rubber-soled shoes and dry hands.
Step 3: Contain the water and protect your belongings
Once the supply is cut off (and the electricity if necessary), it's time to minimize the damage from the water that has already spilled:
Immediate actions
- Place buckets and containers under active drip points (even if you have closed the valve, the pipes still contain residual water that will continue to drip for a while).
- Use towels and rags to create barriers that divert water away from furniture, appliances, and valuable items.
- Remove carpets and objects from the floor in the affected areas. Carpets trap moisture underneath and accelerate damage to the floor (especially parquet).
- Open furniture and drawers in the affected area to facilitate ventilation and prevent moisture buildup.
- If water is falling from the ceiling: make a small hole with a screwdriver at the lowest point of the stain to drain the water in a controlled manner into a bucket. It’s counterintuitive, but a controlled hole is much better than letting the ceiling accumulate liters of water until an entire plasterboard panel collapses.
What NOT to do
- Do not use a household vacuum to absorb water: it can electrocute you. Only liquid vacuums (wet & dry) with appropriate IP protection.
- Do not move heavy furniture over wet floors: you can scratch the floor permanently and injure yourself from slipping.
- Do not turn on underfloor heating to “dry”: if the leak is in the underfloor heating pipes, you will worsen the loss.
Step 4: Document the damage with photos and video
This step is KEY for the insurance and many people skip it due to the rush to clean. Don't make that mistake:
What to document
- Panoramic video of each affected room, showing the extent of the flooding
- Detail photos of the leak point (if visible)
- Photos of the damage to floors, walls, ceilings, furniture, and appliances
- Photo of the water meter showing the current consumption (the adjuster will compare it with the previous bill)
- Water level mark on the wall (indicate with adhesive tape how high the water reached)
How to document
- Use your mobile with date and time activated in the camera settings (the EXIF metadata is proof for the insurance)
- Record a video narrating what you see: “It’s 3 AM on June 15, I just discovered water coming out of the bathroom wall...”
- Do not clean ANYTHING until you have fully documented
- If there is damage to belongings (appliances, furniture, clothing), photograph them with the receipts or purchase invoices if you have them
Important fact: According to our experience with thousands of incidents, insurance claims with complete photographic documentation are resolved 40% faster and with compensations 25% higher than those without it.
Step 5: Notify the neighbor or the community
Depending on the situation, you may need to communicate with your neighbors or the homeowners' association:
If the leak affects you and comes from above
Go to the upstairs apartment and notify the neighbor. They may not be aware of the leak (many leaks in embedded pipes do not produce symptoms in the originating apartment, only in the one below). If they are not home, call the president of the community or the property manager to facilitate contact.
If the leak is coming from your home and affects a neighbor
Assume responsibility immediately. Notify the affected neighbor, document the damage (yours and theirs), and file a claim with your home insurance. Your liability policy will cover the damages caused to the neighbor.
If the leak is in common elements
Immediately notify the property manager or the president of the community. Common elements (downspouts, community pipes, connections) are the responsibility of the homeowners' association. The community insurance is the one that should cover the repair.
Step 6: File a claim with the insurance
The sooner, the better. The Insurance Contract Law (Law 50/1980) establishes in its article 16:
Art. 16 LCS: “The policyholder or the insured must notify the insurer of the occurrence of the incident within a maximum period of seven days from having known it, unless a longer period has been established in the policy.”
What information do you need to file the claim
- Home insurance policy number
- Approximate date and time of the discovery of the leak
- Description of what happened (where the leak is, what damage there is)
- Photos and videos (Step 4)
- If there are third parties affected: name, apartment, phone, and insurer of the neighbor
- If you have taken containment measures (valve closure, etc.)
How to report the incident
Most insurers offer multiple channels:
- 24h Phone: The fastest channel. The insurer will open a claim number and, if the leak is urgent, may send an emergency plumber (service included in many policies).
- Insurance App: Many insurers (Mapfre, AXA, Zurich, Allianz) have mobile apps that allow you to file claims with attached photos.
- Email or website: Valid but slower. Make sure to receive confirmation of receipt.
What the insurance covers (and what it does not)
The standard coverage for “water damage” in a home insurance usually includes:
- ✓ Search and location of the leak
- ✓ Damage caused by water to floors, walls, ceilings, and belongings
- ✓ Repair of the pipe or element that caused the leak
- ✓ Liability for damages to third parties
- ✗ Preventive maintenance
- ✗ Natural wear of pipes (depends on the policy)
- ✗ Pre-existing leaks before the contract
Step 7: Call Telefuga for exact location without construction
Once the emergency is contained and the claim is filed with the insurance, the next step is to precisely locate the exact origin of the leak. This is where Telefuga comes in.
Why is it not enough to call the insurance plumber?
Insurers usually send an emergency plumber whose function is to alleviate the emergency (close a valve, temporarily patch), not to precisely locate the leak. For exact location, professional equipment is needed that most plumbers do not have:
- Electronic geophone: Detects the sound of the leak through floors and walls. Ideal for embedded pipes under flooring.
- Tracer gas (helium/hydrogen): Locates leaks in buried or embedded pipes with centimeter precision, without breaking walls or lifting floors.
- Infrared thermography: Shows the thermal footprint of water behind walls and floors without the need for demolition.
- CCTV camera: Inspection of the interior of downspouts and sewage pipes.
How Telefuga's intervention works
- Call and evaluation: You call us (available 24h, including weekends and holidays in our emergency service). We evaluate the situation by phone and assign the nearest technician.
- Technical visit: The technician arrives with complete equipment (geophone, tracer gas, thermal camera). Average arrival time: 2-4 hours in urban areas, same day in rural areas.
- Detection: We use the most appropriate technique depending on the type of leak. Typical leak detection is completed in 1-3 hours.
- Report: We issue a technical report with the exact location, the cause, thermal photos, and repair estimate. This report serves for your insurance.
- Repair: If you wish, we can carry out the repair at the same time or in a scheduled second visit. Always using minimal intervention techniques: repair without construction when possible.
Step 8: Follow-up on the repair and final check
The repair does not end when the crack is closed. It is necessary to verify:
Post-repair checks
- Pressure test: Pressurize the repaired section to confirm tightness (minimum 15 minutes without pressure drop).
- Monitor the meter: Close all faucets and check that the meter does not move for at least 1 hour.
- Visual review at 24-48h: Check that no moisture stains reappear in the repaired area.
- Drying: If there has been flooding, complete drying can take weeks. Ventilate, use dehumidifiers, and monitor for mold appearance (especially in humid climates like the coast of Alicante and Murcia).
Final documentation for the insurance
- Repair invoice
- Telefuga's technical report
- Before and after photos
- Restoration estimates (painting, flooring, damaged furniture)
Common mistakes that worsen the situation
In our experience with 38,000 resolved leaks, these are the mistakes we see most often that harm the owner:
| Error | Consequence | The correct action |
|---|---|---|
| Not closing the shut-off valve | Damage multiplies every minute | Close immediately |
| Cleaning before documenting | The insurance cannot assess the actual damage | Photos and video BEFORE cleaning |
| Not notifying the insurance in time | Denial of coverage | Notify within 7 days |
| Breaking walls to search for the leak | Unnecessary damage and restoration costs | Use professional detection without construction |
| Repairing without locating the source | The leak reappears in weeks | First locate, then repair |
| Ignoring small leaks | They worsen over time and damage the structure | Every leak requires attention |
| Not ventilating after the repair | Mold appearance and health problems | Ventilate and dehumidify for weeks |
What to do if the leak occurs outside of business hours?
Leaks do not respect schedules. In fact, many are discovered at dawn or on weekends, when the house is quiet and the dripping can be heard, or when returning from vacation you find the floor flooded.
Telefuga's 24h Service
Telefuga offers 24-hour emergency service, 365 days a year, in the 5 coverage provinces (Murcia, Alicante, Valencia, Albacete, and Almería). If you discover a leak at 3 AM on a Sunday:
- Close the shut-off valve (Step 1)
- Contain the water (Step 3)
- Document (Step 4)
- Call us: our emergency phone works 24h
The technician will arrive as soon as possible (usually within 2 hours in urban areas) with all the necessary equipment to locate and, if possible, repair the leak in the same visit.
Most common types of leaks in homes
To know what you are facing, here are the most common types of leaks we handle at Telefuga:
Leaks in embedded pipes
Water pipes (copper, multilayer, PPR) embedded in walls and floors are the most frequent cause of domestic leaks. They manifest as moisture stains on the wall, dripping from the ceiling of the neighbor below, or swelling of the parquet. Detection without construction using geophone and tracer gas allows for localization without breaking.
Heating leaks
Heating circuits through radiators or underfloor heating circulate pressurized water throughout the home. A leak in these circuits manifests as a loss of pressure in the boiler (the manometer drops below 1.5 bar) and the need to refill the circuit periodically. Telefuga offers a specialized service for leak detection in heating.
Leaks in downspouts
Downspouts (PVC, fiber cement in old buildings, lead in very old ones) transport wastewater from all floors. When they have a leak, the smell is characteristic and the damage affects multiple homes. The repair of downspouts without construction through internal lining is the cleanest and fastest solution.
Leaks under the floor (sanitary slab or screed)
Pipes running under the floor (connection, general distribution) are the hardest to locate without technology. The usual symptom is rising humidity in baseboards and walls, swelling of the floor, or, in severe cases, permanent flooding. Tracer gas is the only reliable technique for these leaks.
Emergency kit: what you should have at home
Preparing before a leak occurs makes a difference. We recommend having accessible:
- Square key: To open the external water chamber (2-3€ at hardware stores)
- Teflon tape: To temporarily seal a leaking threaded joint
- Repair clamp: A metal piece placed over the broken pipe to temporarily seal it (5-15€)
- Old towels and buckets: To quickly contain water
- Flashlight: Many shut-off valves are in dark areas (storage rooms, technical cabinets)
- Telefuga's phone number: For 24h emergencies
- Insurance policy number: Keep it noted in an accessible place (not just in the app, which does not work without light)
Summary checklist: 8 steps in case of a water leak at home
| Step | Action | Time |
|---|---|---|
| 1 | Close the main shut-off valve | Immediate (1-2 min) |
| 2 | Cut off electricity if there is a risk | Immediate (1 min) |
| 3 | Contain the water and protect belongings | 5-15 min |
| 4 | Document damage with photos and video | 10-20 min |
| 5 | Notify the neighbor/community if applicable | 5 min |
| 6 | File a claim with the insurance | 10-15 min |
| 7 | Call Telefuga (24h) | 5 min |
| 8 | Follow-up: repair + check | 1-7 days |
Conclusion
Discovering a water leak at home is stressful, but if you follow these 8 steps you will minimize the damage, protect your belongings, and facilitate insurance coverage for everything necessary. The key is: act quickly (shut-off valve), document well (photos and video), and call professionals to locate the leak without destroying your home.
At Telefuga, with 38,000 resolved leaks, 4.8/5 on Google Maps, ISO 9001 certification, and 24h service in Murcia, Alicante, Valencia, Albacete, and Almería, we are ready to help you at any time. Our techniques for water leak detection without construction avoid unnecessary damage and our technical report maximizes your insurance coverage.
Do you have a leak right now? Request a free quote or call us at the emergency phone. Every minute counts.


